
Coop Build Part Four

Nest Box and More

Too many spaces, not enough chickens!

Chalk it up to being a newbie chicken coop designer, or wanting to have the opportunity to expand the coop for more birds, or my eagerness, but I made a space of 24" x 72" to be split into two levels of six boxes per level. With the conventional chicken Math (explanation of the phenomenon of Chicken Math is coming in a future post) of 3-4 birds per nest I would have room for 48 chickens! However, this does not  jive with CMath tenet #4 which is 4 square feet per bird, or a total of 16 birds for the floor space I have right now.  I then went back to the drawing board and came up with this new plan. You can see in the photo I have 5 boxes with storage above and vertical storage next to them. Hinged lids and doors create the access to each of the three areas. Each of the nest boxes have a plastic tote for cleaning and routine sterilization. With the outer door access daily egg collection and replacement of the bedding / nesting materials should be way more efficient.  
When viewed from the from the inside you can just see the plastic nest tubs held in by a 1" x 2" nest step / barrier.  I lined the inside of each cubicle with the same flooring linoleum so it will be easier to clean as well. This design creates lots of storage for the cleaning supplies and still allows for future expansion.  All inside surfaces will be painted for better cleaning.

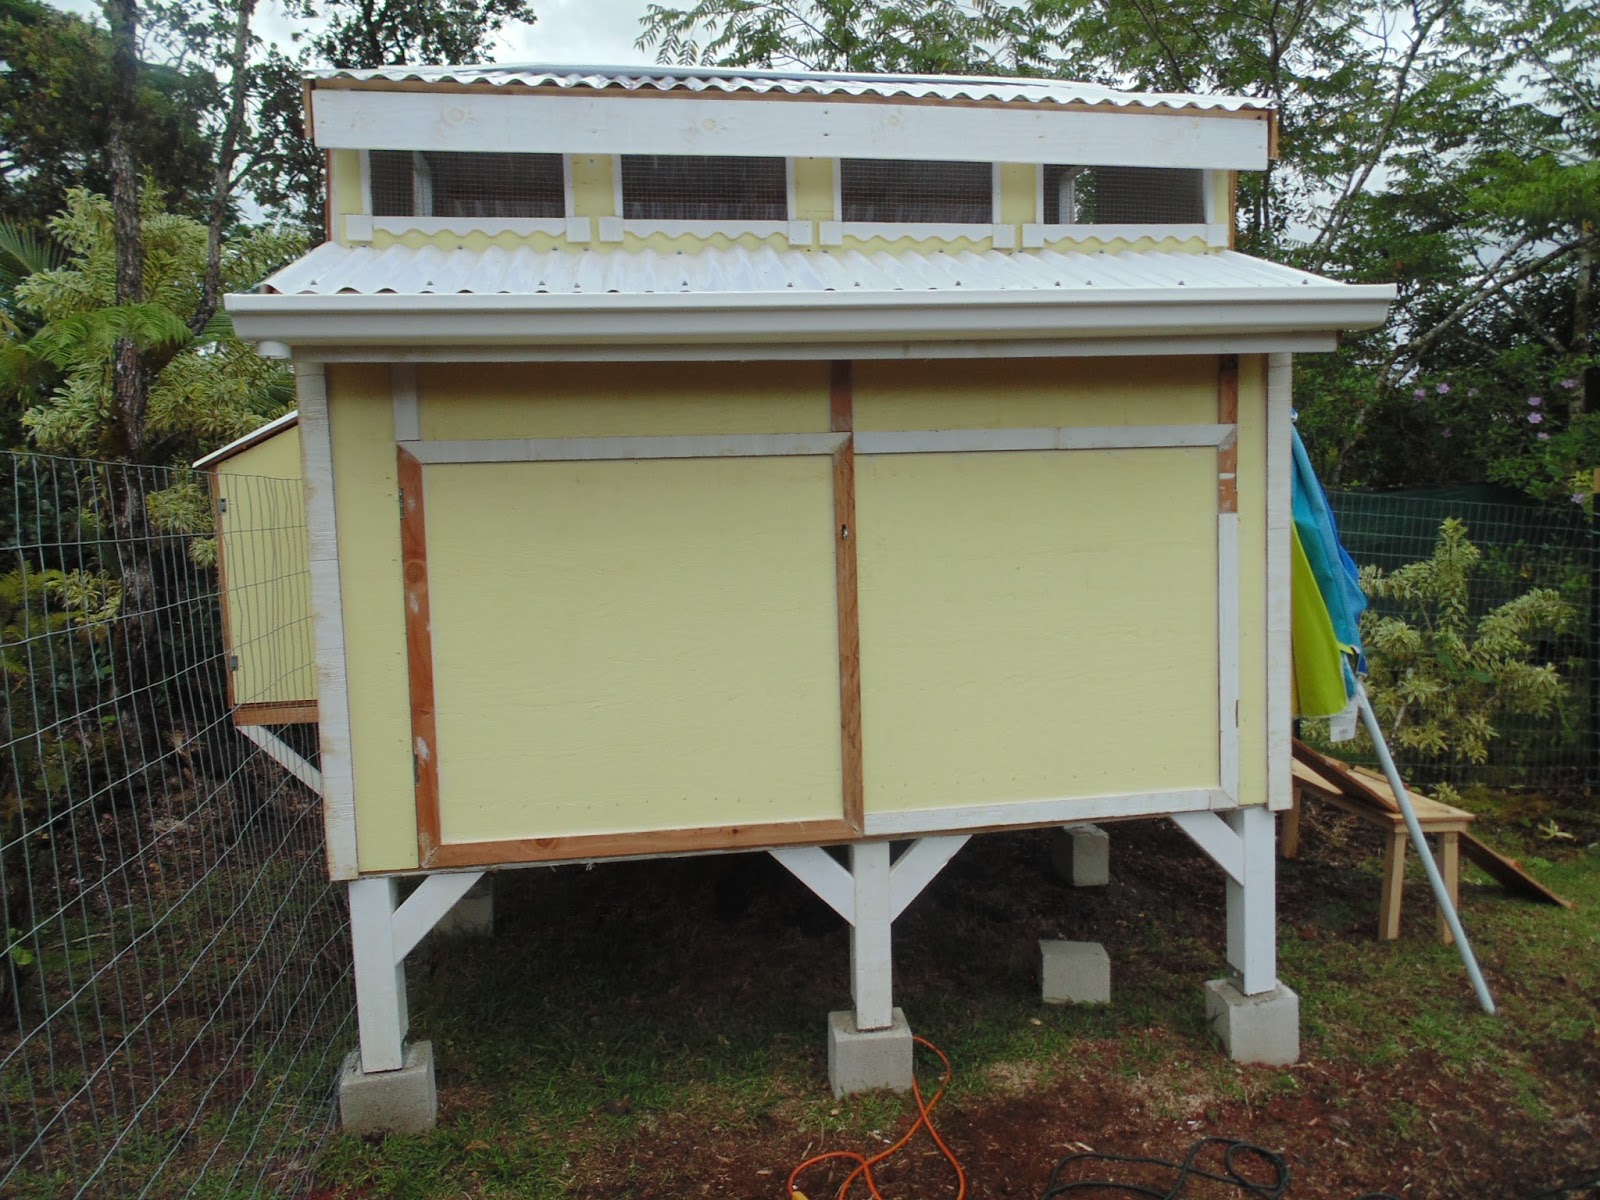
This is a a shot of the exterior showing the hinged roof, the hinged vertical access door and the egg access door (in white). I also added lower supports of 1" x 2" at a 45 degrees for bracing the nest box, and all abutting edges will get trim. The roof will get the PVC roofing as this is the wall that faces into the weather.

This angle shows the two full side clean out doors. Trimmed out, this allows for fast and easy rake out of the entire coop. You can also get a better view of the nest box bracing.


Water supply comes via the heavens- Like our own home, we catch the rainwater and filter it for our own use, we will be doing the same for all the animals we end up getting. The system starts with the gutters attached to the roof eaves. We will put in a screen across the top to keep out the leaves and larger bugs and animals (we have lots of geckos that love the gutters) and since we recently replaced the entire filtration system for our home, the chickens get the hand-me down of our old home filter system. The gutters will fill a tank that hangs next to the nest box and distribute water into the coop and below it as the chickens will have access to shade and a dry environment  by going under the coop. We are planning to get the chicken water nipples for keeping the site as dry as possible.


This is the old pressure tank we changed out that will become our feed storage bin. On the left it is how it came, and on the right is how I modified it for Chicken Feed. I removed the black cap and inner liner (the rusty bag in the upper left of the right photo) and wire brushed the interior to remove all the scale and rust. I then painted it to seal off the tank, added a flange to run PVC piping, and the boards you see are going to allow me to hang it with the PVC pointing down for a gravity feed system. This will also be a dual feed station set up: a small "snacking" station inside the coop with the main feeding station below the coop to keep it out of the considerable rain we get on this side of the Island.

The ramps. Since we are on an uphill site, the ramp from the pop doors will need a ramp of 6 feet. Rather than make it in one long piece, we chose to break it into a short ramp, landing and short ramp. If they have an issue with the lower ramp just being a singe, I'll add a second one but for now it stays this way.


Fencing. We went with the 5 foot 2x4" pet and small livestock fence wire on T bar posts. What an adventure. Since the lot is an old lava flow, getting the posts into the ground needed a rock drill and a couple of hours work for just 7 posts. We will be adding corner bracing and a row of lava rocks to reinforce the lower edge to keep the larger predators out. There is too much lava to have to worry about them digging under the fence, but weasling under it is a possibility. We'll use tent spikes to anchor the wire under the cobbled lava.

We are caught up to the current status of the build, and it is chicken friendly with just a door that will be installed today. Final trim paint, water and feed stations can go in later (we'll use conventional feeders and waterers for now) so we can get the first birds in!    

Next post: Grand Opening!


Comments

Popular posts from this blog

Update

Update Chickens are growing Big news, right? Well, it has been a while since I posted here and a lot has happened. Yes, the chickens have been getting bigger; the Cornish Cross are insanely huge and the Rhode Island Reds and Barred Rock hens are now officially old enough to be called pullets.  Their Foster Moms have abandoned them, meaning they are no longer protective of them and instead are making sure they (the hens) are getting the pullets inducted into the flock's 'Pecking order'. The pullets are basically on their own, though chickens really don't need to be taught much. The pullets are finding a pecking order of their own, fussing at and with each other as it should be in the natural order of chickens. The Cornish Cross are amazing. We purchased them three weeks after the pullets and they caught up in size in just two weeks. At three weeks old, the Cross chicks were taller than the Pullets at 5 weeks. Tomorrow they will be 7 weeks old, and they are

Coop Build Part Three

Installation Time Or, the real business of Construction Okay, the garage build was prep time for making panels, now is the time I consider that the real building got started.  I didn't take a lot of Photos so it looks like a lot happened, which it did. Making each wall a panel allowed for fast assembly. This photo shows the piers in place and the floor set on them. It was sturdy, but a bit too wobbly for me knowing I had a few more feet of building going up soon. So I then cut (2) 2x4 braces for each pier and screwed them in using 3" gold screws, not real gold, but they are called that. Not sure why other than their color. We then attached the linoleum.  Sure we risked it getting damaged from adding this early, but by placing it under the bottom plates of all the walls, we figured less water penetration into the floor this way. So far so good- no big gouges yet. These walls went up in less than 20 minutes and I was working alone this day. By allowing an overhang

Grain Sprouting Update

New and Improved Seed Station Or, protecting and taking the stink out of the seeds.   My last post was about the idea of sprouting seeds for our chickens gastronomical pleasure.Since then, I have run into a few problems that I think I have solutions for, we'll see. This is my Sprouting station as built: A standard set of big box store shelf racks set up on the ground near a water source. Seeds soaked in a bucket for 24 hours (convenience, as they need only 8-10 hour soaks) then spread out in an even layer on a 10" x 20" garden tray with pre-punched holes. Problem 1. Water distribution. Dry seeds in one side, flooded on the other. Problem 2.  During the night rats and during the day the birds  are getting to the seeds eating and fouling the trays with husks and their waste. Between the two shifts, I am losing almost half the seeds to these scavengers. This is my Sprouting station as it is today: We added 5 more shelves, a larger water recovery tub for reci